
Documentation - Waterfall
Overview Waterfall
The SCvation waterfall visualization is a visual support and representation of a waterfall course that is defined by effects or absolute deviations. The visualization has the option of displaying this data in a waterfall display with additional start and end totals, which can also be calculated. It is important here that the effects or deviations are the focus in order to better recognize strong or weak points in a development.
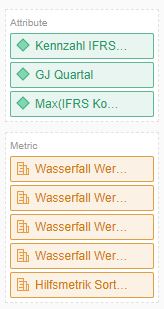
Drop Zone
- Attribute
- 4 x Attribute
- Contains the runs of the processes
- Metric
- 8 x Metriken
- Contains the events/actions that are run through during the process
Options-Menu
Menu Button
Pressing this button opens the SCvation menu.
Various settings and formatting of the visualization can be changed with the menu.
General
General > General
General settings for orientation, data usage and number formatting are made in the options menu General > General.
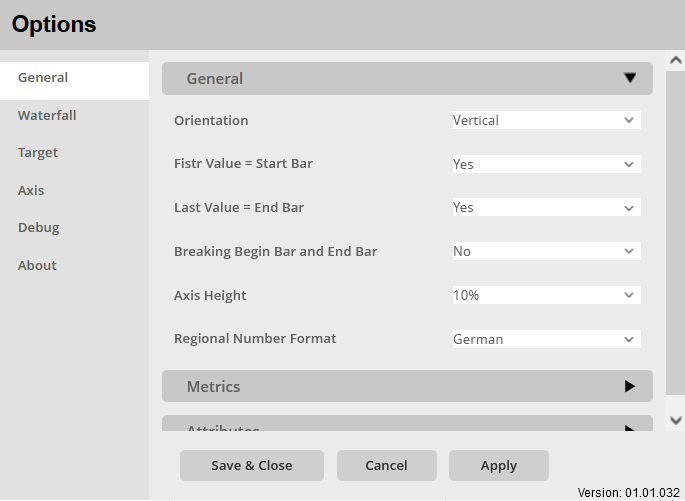
Orientation:
Option to set the orientation of the graph.
The orientation of the waterfall is set
The following options are available:
- Horizontal
- The waterfall bars are displayed horizontally, so they span from left to right and the bars are displayed one below the other.
- Vertical
- The bars are displayed vertically, so they span from bottom to top and the bars are displayed side by side.
First Value = Start Bar:
Setting to define the start bar. Defines that the first value from the metric contains the value of the start bar. If this is not the case, the start bar will be calculated additionally: YES / NO
Last Value = End Bar:
Setting for defining the end bar. Define that the last value from the metric contains the value of the end bar, if this is not the case the end bar is calculated additionally: YES / NO
Breaking Begin Bar and End Bar:
Setting to clip the start and end bars if they are too big compared to the waterfall values: YES / NO
These truncations are also automatically carried out in the event of events, regardless of the setting made.
Axis Height:
Setting to adjust the height of the X-axis: 5% – 50% in 5% steps.
Regional Number Format:
Option to assign the regional number format to the visualization. In particular, this is about the representation of the comma and the thousands separator. A distinction is made between German and English format.
- German
- Thousand separators: “.”
- Decimal place: “,”
- English
- Thousand separators: “,“
- Decimal place: “.“
General > Metrics
Specific settings for the metrics are made in the options menu General > Metrics.
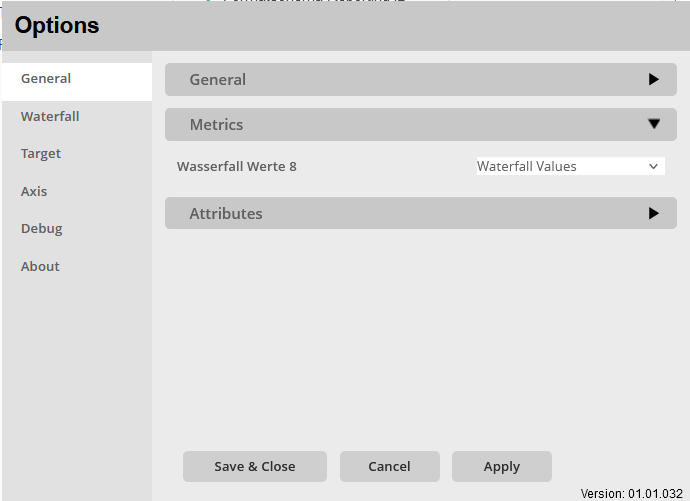
Metrics:
Enable/disable the metrics for the visualization.
In addition, a type can be added to the metrics. The metrics can be declared as follows:
- OFF
- The metric is disabled for the visualization.
- Waterfall Value
- The metric is used to display the waterfall
- Target 1
- The metric is represented as Target 1
- Target 2
- The metric is represented as Target 2
General > Attributes
Specific settings for the attributes are made in the options menu General > Attributes.
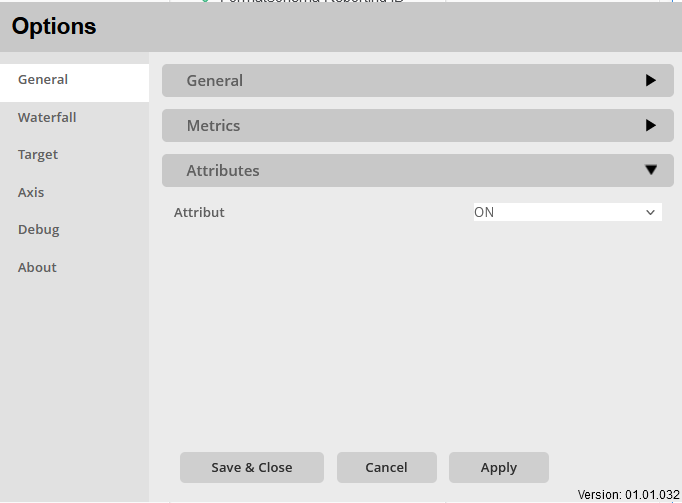
Attributes:
Activate/deactivate the attributes for the visualization: ON / OFF
The first selected attribute is then used to split the bars and all contents of the selected attributes are displayed in the x-axis.
Waterfall
Select a Section/Metric:
Selector to select the metric for which the following waterfall formatting should be done.
It should be noted here that only the metrics that are declared as waterfall values or as OFF can be selected.
Waterfall > Waterfall Formatting
General settings for formatting the waterfall are made in the Waterfall > Waterfall Formatting options menu.
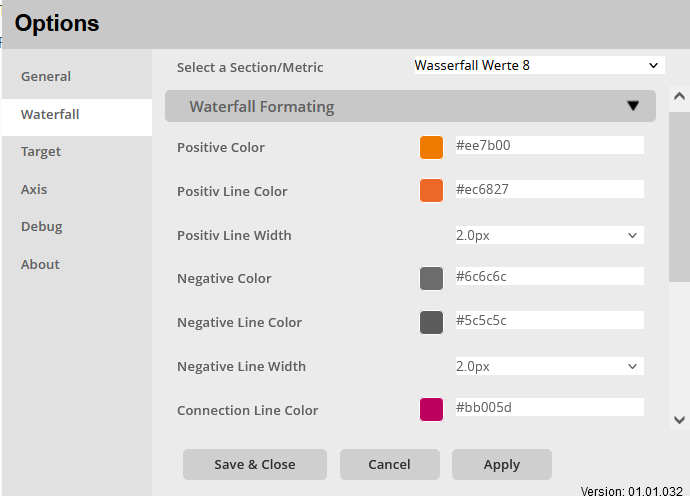
Positive Color:
Setting a signal color for the positive waterfall bars.
Color selection:
- Color-Menu:
- The color can be selected using buttons.
- The colors of the buttons are predefined and can be customized for the specific company.
- Using the text field in the color menu, additional colors can be added using a hex code.
Positive Line Color:
Setting a signal color for the border of the positive waterfall bars.
Color selection:
- Color-Menu:
- The color can be selected using buttons.
- The colors of the buttons are predefined and can be customized for the specific company.
- Using the text field in the color menu, additional colors can be added using a hex code.
Positive Line Width:
Setting the line thickness for the border of the positive waterfall bars
Choice for formatting:
- OFF
- 0.1px – 8px
Negative Color:
Setting a signal color for the negative waterfall bars.
Color selection:
- Color-Menu:
- The color can be selected using buttons.
- The colors of the buttons are predefined and can be customized for the specific company.
- Using the text field in the color menu, additional colors can be added using a hex code.
Negative Line Color:
Setting a signal color for the border of the negative waterfall bars.
Color selection:
- Color-Menu:
- The color can be selected using buttons.
- The colors of the buttons are predefined and can be customized for the specific company.
- Using the text field in the color menu, additional colors can be added using a hex code.
Negative Stroke Width:
Setting the line thickness for the border of the negative waterfall bars
Choice for formatting:
- OFF
- 0.1px – 8px
Connection Line Color:
Setting the line color for the connecting lines between the bars of the waterfall.
Color selection:
- Color-Menu:
- The color can be selected using buttons.
- The colors of the buttons are predefined and can be customized for the specific company.
- Using the text field in the color menu, additional colors can be added using a hex code.
Connection Line Width:
Line thickness setting for the connecting line between the bars of the waterfall.
Choice for formatting:
- OFF
- 0.1px – 8px
Waterfall > Start Bar Format
In the options menu Waterfall > Start Bar Format specific settings for the start bar formatting of the waterfall are made.
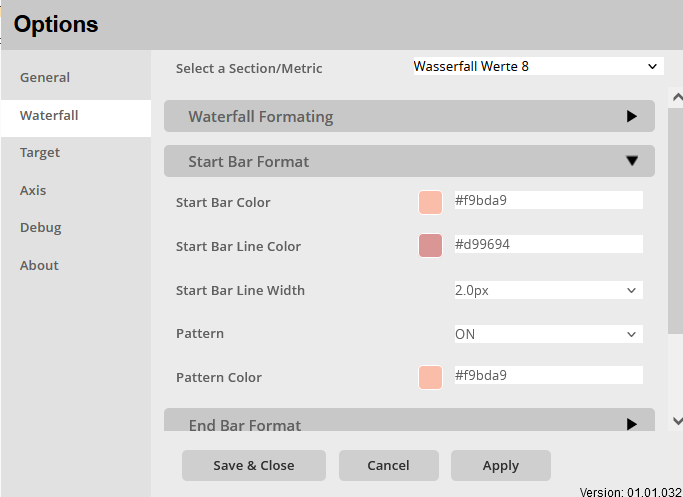
Start Bar Color:
Setting the fill color for the start bar of the waterfall.
Color selection:
- Color-Menu:
- The color can be selected using buttons.
- The colors of the buttons are predefined and can be customized for the specific company.
- Using the text field in the color menu, additional colors can be added using a hex code.
Start Bar Line Color:
Setting the border color of the waterfall start bar.
Color selection:
- Color-Menu:
- The color can be selected using buttons.
- The colors of the buttons are predefined and can be customized for the specific company.
- Using the text field in the color menu, additional colors can be added using a hex code.
Start Bar Line Width:
Setting the line thickness for the border of the waterfall start bar.
Choice for formatting:
- OFF
- 0.1px – 8px
Pattern:
Enable/disable filling the start bar with a hatch: ON / OFF
Pattern Color:
Set the color of the bar hatching when enabled.
Color selection:
- Color-Menu:
- The color can be selected using buttons.
- The colors of the buttons are predefined and can be customized for the specific company.
- Using the text field in the color menu, additional colors can be added using a hex code.
Waterfall > End Bar Format
Specific settings for the end bar formatting of the waterfall are made in the Waterfall > End Bar Format options menu.
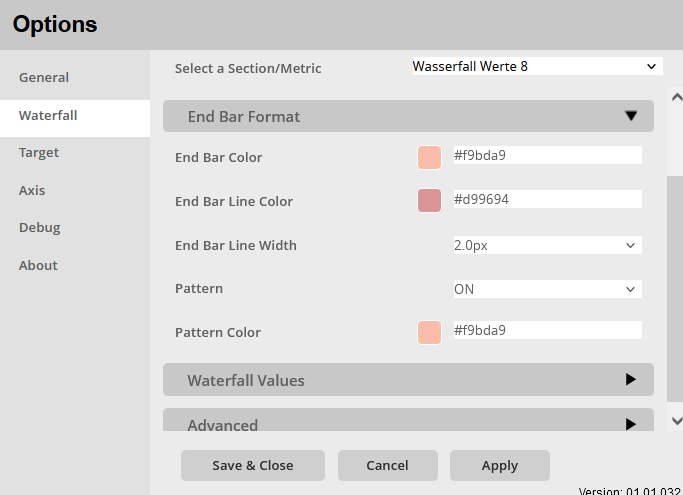
End Bar Color:
Set the fill color for the end bar of the waterfall.
Color selection:
- Color-Menu:
- The color can be selected using buttons.
- The colors of the buttons are predefined and can be customized for the specific company.
- Using the text field in the color menu, additional colors can be added using a hex code.
End Bar Line Color:
Set the border color of the end bar of the waterfall.
Color selection:
- Color-Menu:
- The color can be selected using buttons.
- The colors of the buttons are predefined and can be customized for the specific company.
- Using the text field in the color menu, additional colors can be added using a hex code.
End Bar Line Width:
Setting the line thickness for the outline of the end bar of the waterfall.
Choice for formatting:
- OFF
- 0.1px – 8px
Pattern:
Enable/disable filling the start bar with a pattern: ON / OFF
Pattern Color:
Set the color of the bar hatching when enabled.
Color selection:
- Color-Menu:
- The color can be selected using buttons.
- The colors of the buttons are predefined and can be customized for the specific company.
- Using the text field in the color menu, additional colors can be added using a hex code.
Waterfall > Waterfall Values
Specific settings for the number formatting of the waterfall are made in the Waterfall > Waterfall Values options menu.
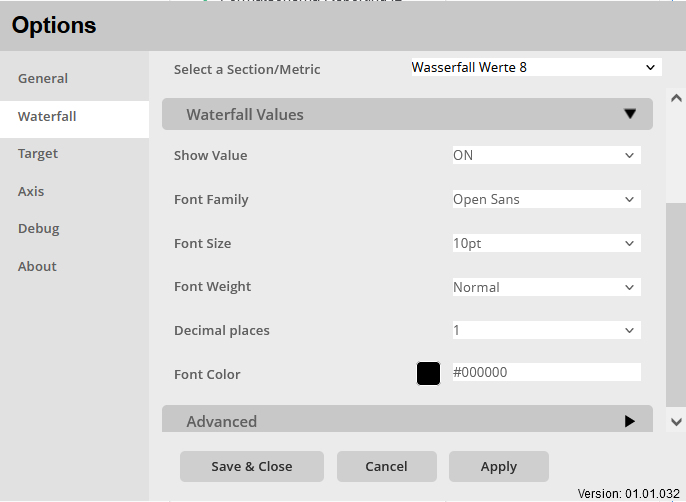
Show Value:
Activate/deactivate the display of the numbers of the waterfall diagram: ON / OFF
Font Family:
Setting to determine the font used for the waterfall values. There are multiple fonts to choose from, including:
- Arial
- Open Sans
- Segoe UI
Font Size:
Setting the font size for the displayed numbers of the waterfall, a selection of font sizes is given:
- 6pt-14pt
Font Weight:
Setting the font weight for the numbers displayed in the waterfall.
Choice between:
- Normal
- Bold
Decimal places:
Set the number of decimal places for the waterfall numbers.
selection: 0 – 5
Font Color:
Set a font color for the waterfall numbers.
Color selection:
- Color-Menu:
- The color can be selected using buttons.
- The colors of the buttons are predefined and can be customized for the specific company.
- Using the text field in the color menu, additional colors can be added using a hex code.
Waterfall > Advanced
Specific settings for switching between metrics for the waterfall are made in the Waterfall > Advanced options menu.
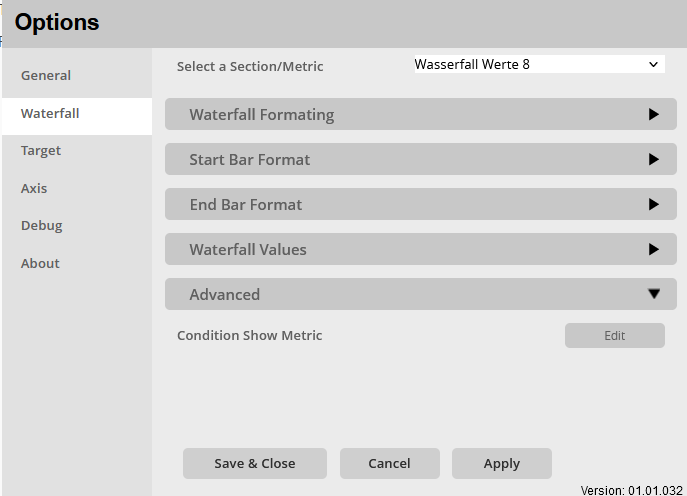
Condition Show Metric:
Set a condition to display a metric or exchange metrics. This can happen in relation to an attribute filter.
- Attribute selector
- Selection of the attribute whose data/content is to be compared
- Comparison operator selector
- ==
- !=
- IN
- NOT IN
- Value input
- Enter a number/text to be compared.
Target
Target > Target
General settings for the formatting of the waterfall targets are made in the Target > Target options menu.
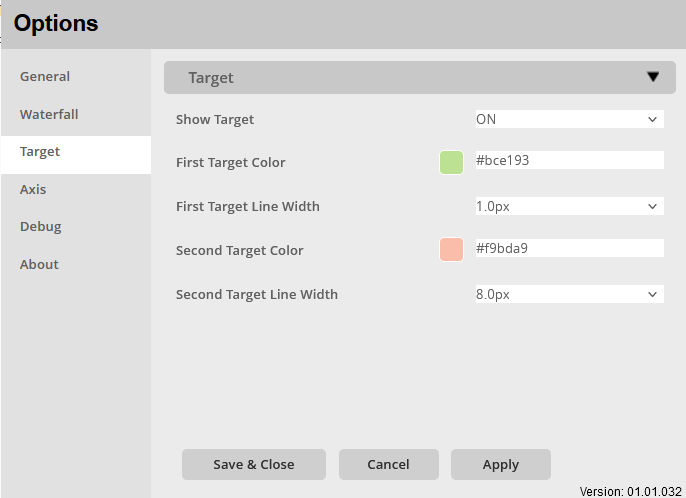
Show Target:
Enable/disable display of waterfall targets: ON / OFF
First Target Color:
Setting the line color for the target 1 of the waterfall.
Color selection:
- Color-Menu:
- The color can be selected using buttons.
- The colors of the buttons are predefined and can be customized for the specific company.
- Using the text field in the color menu, additional colors can be added using a hex code.
First Target Line Width:
Adjustment of the line width for the target 1 of the waterfall.
Choice for formatting:
- Very Fine
- Fine
- Normal
- Bold
Second Target Color:
Setting the line color for the target 2 of the waterfall.
Color selection:
- Color-Menu:
- The color can be selected using buttons.
- The colors of the buttons are predefined and can be customized for the specific company.
- Using the text field in the color menu, additional colors can be added using a hex code.
Second Target Line Width:
Adjustment of the line width for the target 2 of the waterfall.
Choice for formatting:
- Very Fine
- Fine
- Normal
- Bold
Axis
Axis > Axis
General settings for the X-axis of the visualization are made in the options menu Axis > Axis.
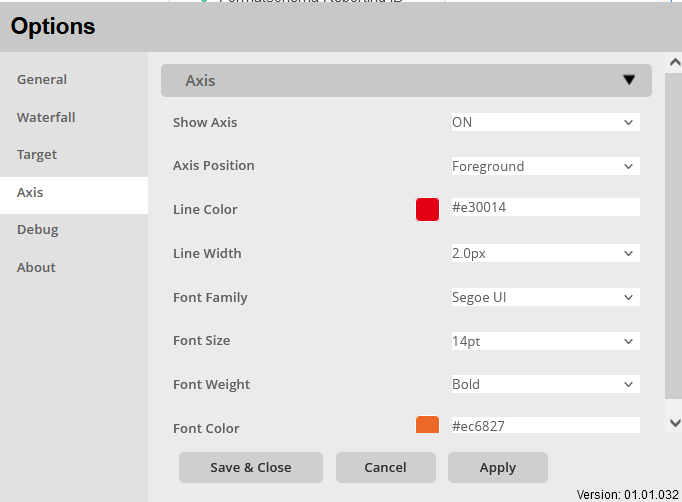
Show Axis:
Enable/disable the display of the waterfall’s X-axis: ON / OFF
Axis Position:
Setting to determine, whether the axis should be in the foreground or the background. Choose from:
- Foreground
- Background
Line Color:
Setting the line color for the X-axis of the waterfall.
Color selection:
- Color-Menu:
- The color can be selected using buttons.
- The colors of the buttons are predefined and can be customized for the specific company.
- Using the text field in the color menu, additional colors can be added using a hex code.
Line Width:
Setting the line thickness for the X-axis of the waterfall.
Choice for formatting:
- OFF
- 0.1px – 8px
Font Family:
Setting to determine the font used for the Axis. There are multiple fonts to choose from, including:
- Arial
- Open Sans
- Segoe UI
Font Size:
Setting the font size for labeling the X-axis of the waterfall, a selection of font sizes is preset:
- 6pt-14pt
Font Weight:
Setting the font weight for labeling the X axis of the waterfall.
Choice between:
- Normal
- Bold
Font Color:
Setting the font color for the X-axis label of the waterfall.
Color selection:
- Color-Menu:
- The color can be selected using buttons.
- The colors of the buttons are predefined and can be customized for the specific company.
- Using the text field in the color menu, additional colors can be added using a hex code.